Chatting apps are revolutionizing not just the way we communicate, but businesses. WeChat’s story is a stark example of how business ecosystems are becoming conversational. Also, the fact that chatting applications have overtaken social media for user-base indicates people’s preference. Businesses, therefore, have started adopting the approach of running operations on a chat-based infrastructure and at Applozic, our mission is to be the enabler of this paradigm shift.
In this tutorial, we will be building a basic android chat app using Applozic SDK in android studio.
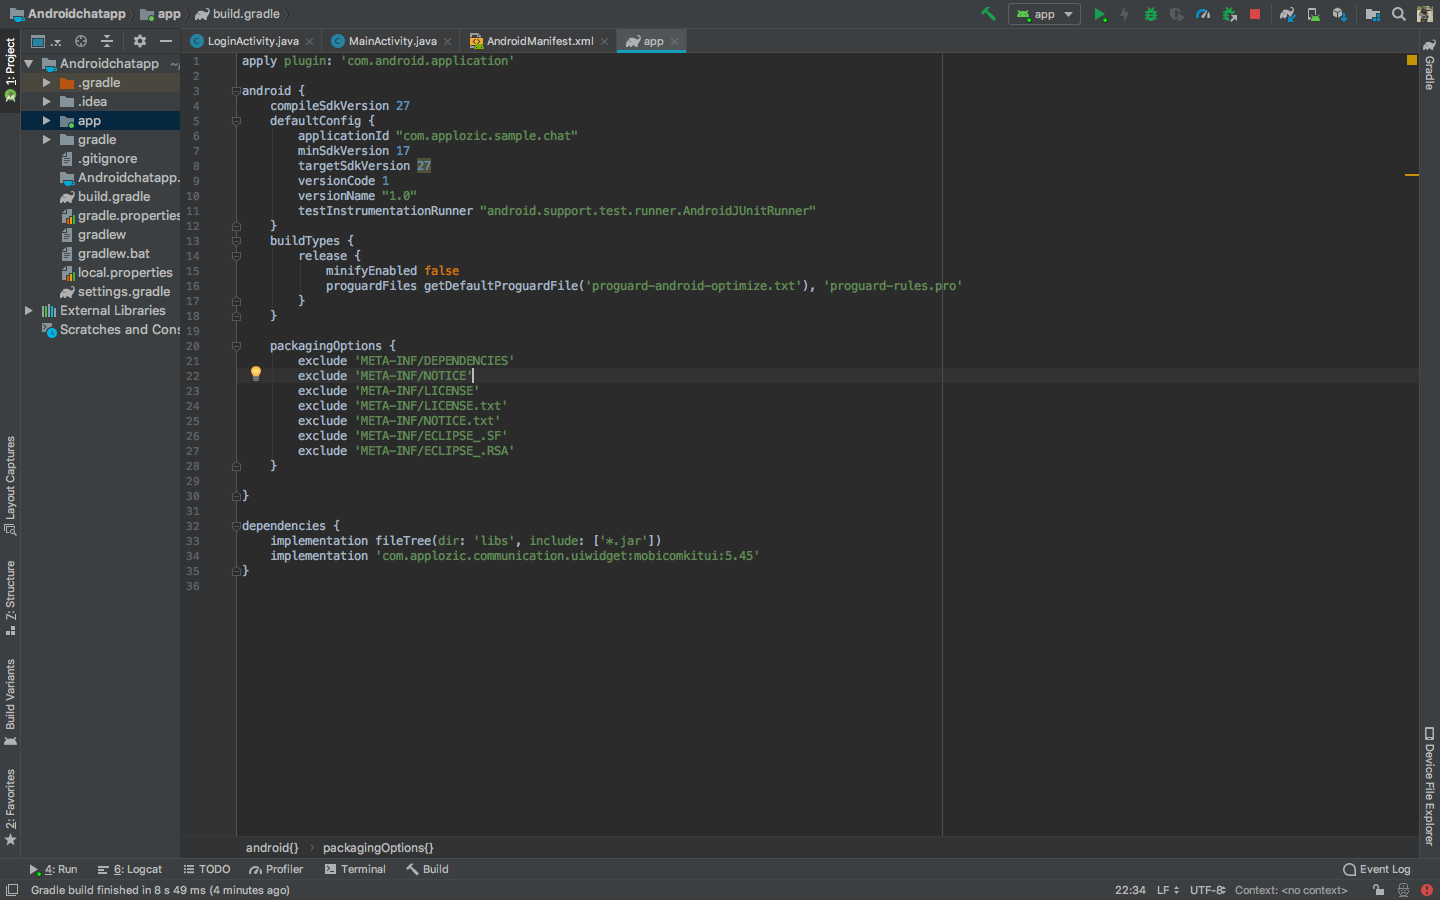
Once gradle is build, you need to exclude a package option to avoid duplicate files or errors.
To exclude package, Just copy the below and add it in your grade android target.
Your build. gradle file will look like this:
Great! Now you’re done with the installation of Chat SDK into the android app.
Let’s get into the third step
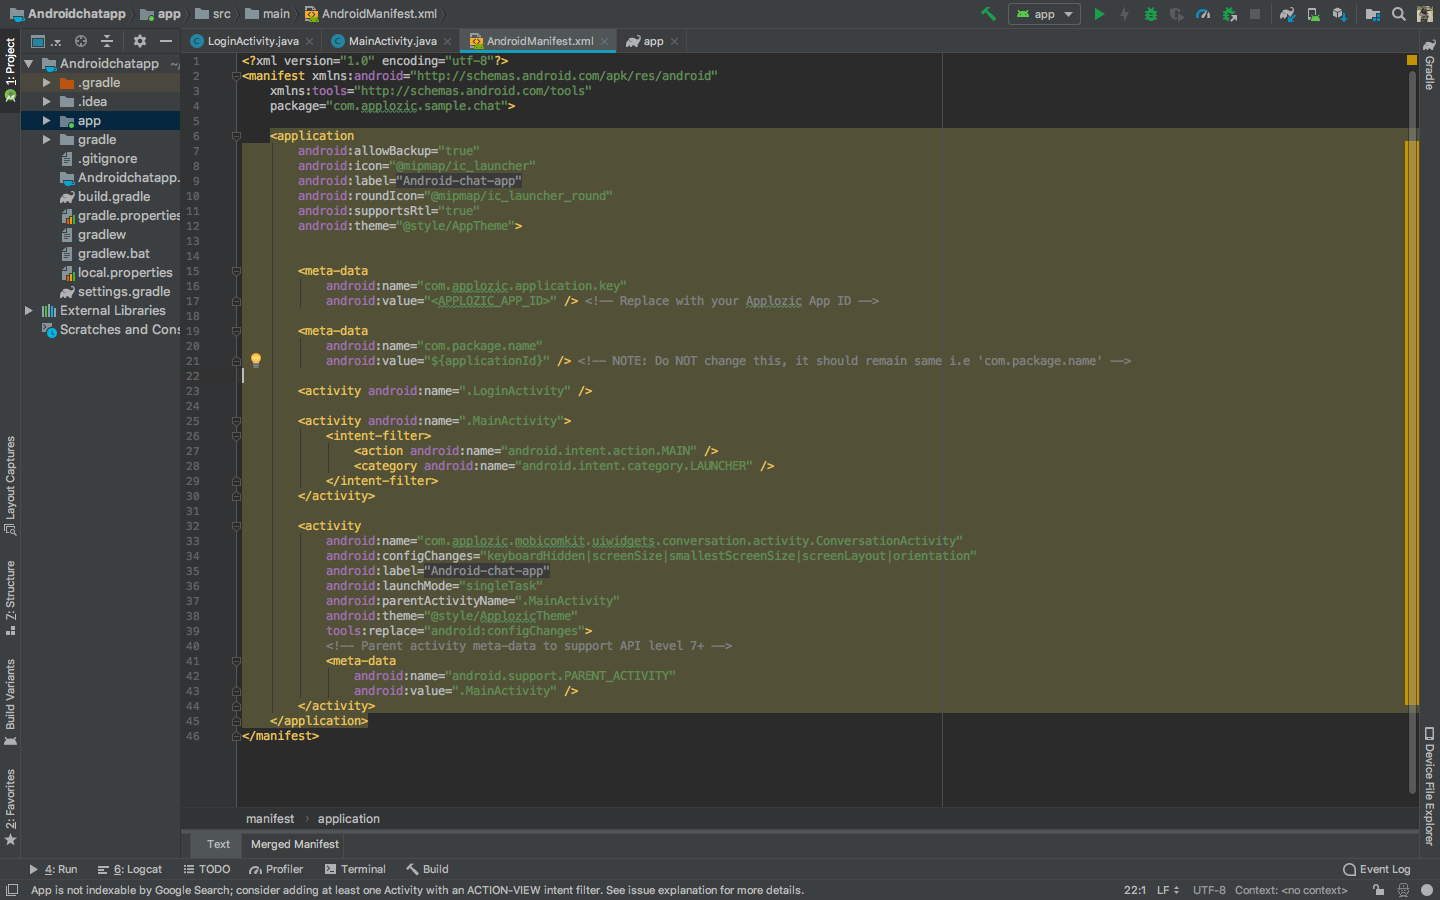
Step 3: Configuration
In this step, you need to CONFIGURE the activity and metadata in your AndroidManifest.xml and put your APP_ID, app icon and attachment folder name. This step is needed because there are some components used by Applozic SDK which needs to be registered in your App-level AndroidManifest.xml file just that you can change their properties. For e.g, you need to add the ConversationActivity.java entry in the AndroidManifest.xml file to add a parent activity(Which belongs to your app) to it.
Add below coding within your android App application tag.
NOTE: Do NOT change this, it should remain same i.e ‘com.package.name’ →
You AndroidManifest.xml file will look something like this:
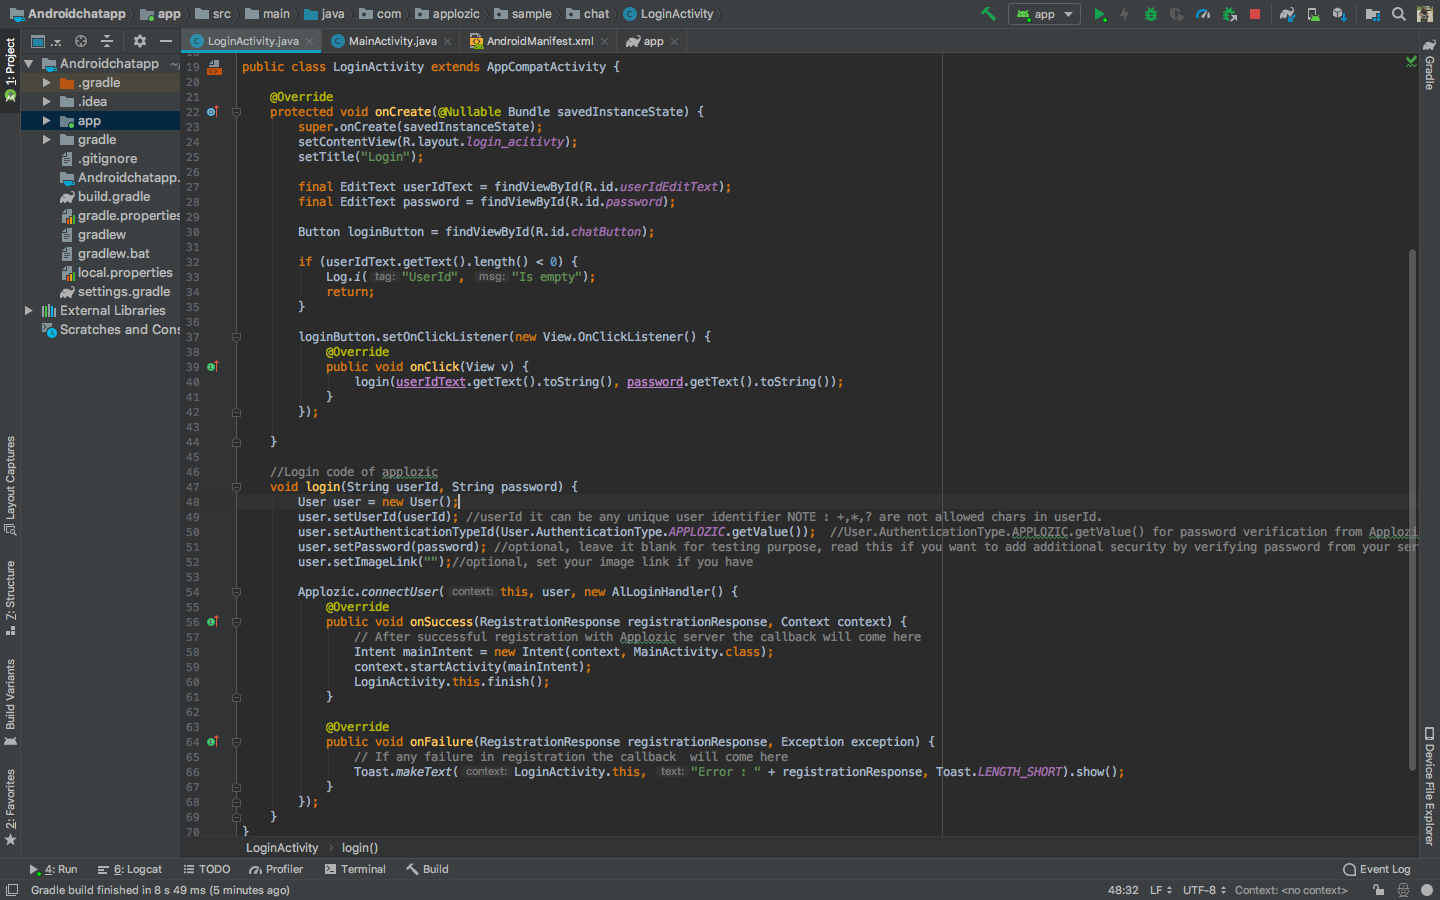
Step 4: Authentication
(You need to make sure that you have already created the a/c in applozic)
Login into Applozic Chat – user registration code – anywhere from your app – pass the required details.
Before accessing any APIs or Screens in Applozic SDK, you need to authenticate a user. You can directly authenticate a user using a userId (The only mandatory field of Applozic User), if the user exists, the SDK will log in the user, if not, the SDK will create the user and login. Do the following operations in LoginActivity.
Create a User object as below:
Pass this user object to the authentication method in Applozic:
This is how the Login Activity will look:
Step 5: Check if the user is already logged in
In your launcher activity(In this sample, MainActivity) you can check if the user is already logged into applozic, if the user is already logged in, launch the chat directly with a userId “test2” (You can use any userId), else we will navigate the user to the login activity.
In your launcher activity’s onCreate() method, add the below code:
This is how the launcher activity will look like:
Here’s How the chat window will look like:
And just like that, your chat app is up and running. You can run it as a standalone application or integrate it into your existing app. What you see as the UI is the default drop-in version and you can customize it completely. We will be covering the steps for customization and the integration in upcoming tutorials.
If you have any question, please drop in the comments. Also, let us know if you want us to cover any specific topics.
PS: I thank Sunil, Ashish, Mukesh, Satadeep from( Applozic team for helping me with initial notes.
See how a real-time chat SDK and API can boost, enhance, and optimize your user experiences.
What’s New: Product Updates From November 2020 | Applozic
In the month of November, we have released the latest
version of iOS SDK. The fastest way to integrate
high-quality 1:1 voice and video calls inside your
application [...]


 2 min read